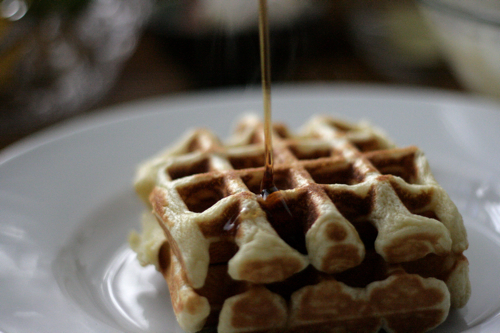
{The Saturday Post} Waffles + Freshly Squeezed Orange Juice

I consider myself a morning person, but I’m not an early morning person. Breakfast during the week is quick, usually cereal with skim milk, and eaten in the den as I check my email before grabbing my purse and heading off to work.

Since breakfast is rushed Monday through Friday, we have a tradition that every Saturday and Sunday, Andrew makes us steamy lattes. He’s impressively good at it now, foaming milk as well as any barista, and giving us a coffee shop experience inside our own living room.

Lime Meltaways

I love lime things. One day I would love to have a lime tree in my backyard. And a lemon tree, an orange tree, and a hybrid avocado tree. It would make cookies like these easier to make, because I could bake them on a whim, without writing an ingredient down on my grocery list. All it would take is softening some butter, and walking outside to pluck a juicy lime from my little tree. And just as quickly as I decided to make them, they would disappear, melting sweetly on my tongue, never to be seen again.

Truffle Mac and Cheese

When I saw Ina Garten make this as a "welcome home" dinner for her dear friends that just returned from Europe (poor things), I couldn't believe what I was watching. Macaroni and Cheese is already decadent, but truffle butter? And mushrooms? Oh my word. I aim to eat healthy, fresh foods whenever possible, but I have my moments, and this was immediately placed on the indulgent list.

Living in Los Angeles, I knew somewhere, a gourmet food market would have white truffle butter. I found the necessary three ounce container at Bristol Farms (for $12, incidentally, but if you consider that this dish would easily feed six hungry dinner guests, it's quite reasonable). Andrew and I strolled home, eager as ever to get in the kitchen.

Before adding the milk and cheese, the truffle butter replaces unsalted butter during the roux-making process. The addition of sautéed mushrooms drives home the earthy elements, and almost makes you think you're doing something good for yourself when you take a bite. Sadly, this is far, far from true. Baking fresh breadcrumbs (from real white bread) studded with parsley and fresh garlic, makes the top crunchy. I was so absorbed in excitement that Andrew had to stop me and ask if we were using plates, because I just stood at the stove for a minute or two, picking off the crunchy noodles for myself.

TRUFFLE MAC AND CHEESE

Recipe courtesy Ina Garten

Serves six to eight at a dinner party, or two adults for about three days.

Ingredients
2 tablespoons unsalted butter
Good olive oil
1 lb. mushrooms (any variety or combination), stems removed and caps sliced 1/2-inch
3 tablespoons sherry
Kosher salt
1 pound pasta, such as cavatappi
3 ounces white truffle butter (recommended: D'Artagnan)
1/2 cup all-purpose flour
1 quart whole milk, scalded
12 ounces Gruyere cheese, grated (4 cups)
8 ounces extra-sharp Cheddar, grated (2 1/2 to 3 cups)
1 teaspoon freshly ground black pepper
1/2 teaspoon ground nutmeg
2 garlic cloves, chopped
3 tablespoons freshly chopped parsley leaves
1 1/2 cups fresh white bread crumbs

Directions
Preheat the oven to 375 degrees F.
                                                                                                                                                           Heat the butter and 2 tablespoons of olive oil in a large (12-inch) saute pan, add the mushrooms, and cook over medium heat for 3 to 5 minutes, until they are tender. Add the sherry and continue to saute for a few more minutes, until the sherry is absorbed. Set aside.
                                                                                                                                                           Bring a large pot of water to a boil and add a splash of olive oil and a pinch of salt. Add the pasta and cook for 6 to 8 minutes, until al dente. Drain well.
                                                                                                                                                      Meanwhile, melt the truffle butter in a large (6-quart) saucepan and whisk in the flour. Cook for 2 minutes over low heat, stirring constantly with a whisk. Slowly whisk in the hot milk and cook for 2 minutes, stirring constantly with a wooden spoon, until the white sauce is thickened and creamy. Off the heat, add the Gruyere, Cheddar, 1 1/2 tablespoons salt, the pepper, and nutmeg.
                                                                                                                                                          Combine the pasta, sauce, and mushrooms in a large bowl and pour them into a 10 by 13 by 2-inch baking dish.
                                                                                                                                                           Place the garlic and parsley in the bowl of a food processor fitted with the steel blade and pulse until they're minced. Add the bread crumbs and pulse to combine. Sprinkle the crumbs over the pasta and bake for 35 to 45 minutes, until the sauce is bubbly and the crumbs are golden brown. Serve hot.

{The Saturday Post} BLT's with Chive Mayonnaise

During the holidays last year, I found myself in the kitchen on a Friday night with absolutely no interest in cooking. Maybe it was all the rich Thanksgiving side dish taste-testing, or the cookies, but part of me was just tired. Although I had what I'm sure was a perfectly acceptable meal planned, I didn't even bother looking in my recipe book. Andrew and I discussed the best course of action, and he opened the fridge to tell me what we had. Bacon and spinach were mentioned. Then I saw a tomato in my vegetable bowl on the counter. And bread was in the freezer. I also had chives, for some reason.

{The Saturday Post} The miracle of mayonnaise

I never thought something like mayonnaise could make me so happy. I don’t eat a lot of it. Mostly on tuna sandwiches and BLT’s, but that’s the extent of my bonding with this condiment. That is, until I discovered the miracle of mayonnaise.

Thanks to movies like Food, Inc., my instincts, and a slew of news articles, I've started paying closer attention to food labels on the few products I buy in a box or a jar. If an ingredient doesn't sound natural, it probably isn't. Let's not spend too much time dwelling on this. The good news is that you can make mayonnaise yourself, with only four pure ingredients. Plus, the food processor does everything for you, slowly emulsifying the eggs so they can absorb the oil, and in less than three minutes you’ll have made a silky, healthier version of a familiar condiment.

Quinoa with Black Beans, Cilantro and Feta

I can confidently admit that we recently ate the same thing for dinner three nights in a row. With slight variations, quinoa was the main event last week. Inspired by my first attempt with cucumbers, I was transfixed with its ability to take on any flavors I used, as well as its quick cooking powers (translation: super easy dinner on the table in about 20 minutes). To put it mildly, quinoa is very cooking after five friendly. With added protein like beans or tofu, it can easily be a main course, but it's also terrific as a side dish for chicken or fish.

{The Saturday Post} Blueberry Muffins


  For as long as I can remember, my family always ate blueberry muffins on Christmas morning. The muffins, a favorite of my dad, became a favoite of mine (as well as poppyseed muffins, but we're talking about blueberries today).

This last Christmas, things were different. Andrew and I spent the holiday with his parents, and my brother was visiting friends in Kansas City as part of an extended road trip he began over the summer. And my parents, with no children to bake for on Christmas morning, drove through the desert to Las Vegas for a getaway. I learned later that my dad missed our usual Christmas muffins.

With my inclination to make everything I possibly can from scratch, I wanted to give these a try. You know, in Februray, in preparation for Christmas 2010, months and months away. But at least I'll be prepared.


BLUEBERRY MUFFINS


{printable recipe}


Recipe courtesy Martha Stewart


If you're thinking of making the lemon ricotta fritters from earlier this week, you'll have some extra curd to spread over the warm muffins.


Ingredients


6 tablespoons unsalted butter, room temperature, plus more for tins
3 cups plus 2 tablespoons all-purpose flour
3 teaspoons baking powder
1 teaspoon salt
1 1/4 cups sugar, plus more for sprinkling
1 large egg
2 large egg yolks
1 teaspoon pure vanilla extract
1 cup milk
1 3/4 cups blueberries


Directions


  1. Preheat the oven to 375 degrees.butter large (3 3/4 inches) or small (2 3/4 inches) muffin tins, and set aside. In a large bowl, sift together flour, baking powder, and salt; set aside.


  2. In the bowl of an electric mixer fitted with the paddle attachment, cream butter and sugar on medium speed until fluffy, about 3 minutes. Add egg, egg yolks, and vanilla; mix until well combined. Reduce speed to low; alternate adding reserved flour mixture and milk to mixer, beginning and ending with flour. Remove bowl from mixer; gently fold in berries by hand.


  3. Divide batter among muffin tins; sprinkle generously with sugar. Bake until light golden, about 45 minutes for large muffins, about 30 minutes for small muffins. Cool in pan 15 minutes. Remove from pan; transfer to wire rack, and let cool completely.


Makes 12 muffins


Steak Salad with Parmesan Butter, Balsamic Glaze, and Arugula

IMG_9310
A few days before I left for a business trip last week, A. and I walked to the Beverly Hills Farmer’s Market to pick up a few things for dinner. Armed with only our appetite and my food notebook nowhere in sight, we had to be spontaneous.


IMG_9253IMG_9261


After walking by a lettuce stand and picking up some peppery arugula, I thought a light salad would be the perfect meal. And just for fun, I bought the biggest heirloom tomato I could find, sliced it, salted it, and we ate it plain, without any bread or herbs-- ideal for a warm, late summer evening.

IMG_9258
I almost didn’t make the Parmesan butter for this salad. I thought it might be too heavy or greasy, and if you use too much it will certainly be both. But a small, teaspoon-size dollop in the middle of your plate adds the perfect creamy texture to this salad.

Steak Salad with Parmesan Butter, Balsamic Glaze, and Arugula

by The Bon Appétit Test Kitchen

Yield: Makes 2 servings

ingredients

2 tablespoons grated Parmesan cheese plus Parmesan cheese shavings
1 1/2 tablespoons butter, room temperature
1 12-ounce rib-eye steak
1 teaspoon olive oil
1/4 cup balsamic vinegar
1/4 cup finely chopped shallots
1/2 teaspoon (packed) dark brown sugar
4 cups (lightly packed) arugula
2 large lemon wedges

Preparation

Mix grated cheese and butter in small bowl. Season generously with salt and pepper; set aside. Sprinkle steak generously with salt and pepper. Heat oil in medium skillet over medium-high heat. Add steak; cook to desired doneness, about 4 minutes per side for medium-rare. Transfer to plate. Add vinegar, shallots, and sugar to skillet; boil until reduced to glaze, stirring constantly, about 1 minute. Divide arugula and Parmesan shavings between 2 plates. Squeeze lemon over. Slice steak; place atop arugula. Top steak with Parmesan butter. Drizzle lightly with glaze.

Tomato and Goat Cheese Galettes

IMG_9182
It’s been hot lately, so when my parents planned to visit for lunch last weekend, I wanted to serve light dishes that could be eaten at room temperature or made ahead. The first course was Vichyssoise, followed by these galettes and a healthy barley and herb salad.


IMG_9168IMG_9172


We all recently saw Julia & Julia, and I had promised to make Boeuf Bourguignon the next time they came over. But the weather had other plans, so I opted for a French-inspired brunch and the beef stew will have to wait for the cooler months.

IMG_9200
I first made galettes about a year ago, and since then have integrated them into my routine on a more regular basis. Once you master the dough (made sweet or savory by adding or subtracting sugar), they’re a template for many ingredients and can be served warm or at room temperature. You can make one large galette or individual tarts. Cover them with mounds of fruit or bake them with a mixture of fresh vegetables and cheese. Eat them with a fork and knife or shove them into your mouth like pizza. To sum up galettes, they’re versatile.

IMG_9183

Tomato and Goat Cheese Galettes

Recipe inspired by Gourmet, Ina Garten, and trial and error. Makes 6 individual galettes, or one large galette.

Tomatoes are at their peak this month, so use them while you can. This particular recipe is wonderful at room temperature. They can be made the day you plan to eat them and left on the counter to cool, or sealed in plastic bags for up to 1 day.

For pastry

1 1/4 cups all-purpose flour
1 stick cold unsalted butter, cut into 1/2-inch cubes
1/4 teaspoon salt
3 to 5 tablespoons ice water

For filling

3 roma tomatoes, sliced
1 medium onion, diced
1 clove garlic, minced
1 sprig thyme, leaves removed
salt
pepper
4 oz. goat cheese, crumbled
fresh basil, cut into ribbons
Parmesan cheese
olive oil

Make dough:

Blend together flour, butter, and salt in a bowl with your fingertips or a pastry blender (or pulse in a food processor) just until most of mixture resembles coarse meal with some roughly pea-size butter lumps.

Drizzle 1-3 Tbsp ice water evenly over mixture and gently pulse in food processor until incorporated. Squeeze a small handful: If it doesn't hold together, add more ice water, 1/2 Tbsp at a time, pulsing until incorporated, then test again. Less is more with the water--too much will make the dough soggy. Although I've made galettes with semi-soggy dough, well-mixed dough should leave an imprint of your finger when squeezed, and not be crumbly.

Turn out mixture onto a lightly floured surface and with heel of your hand, smear the dough once or twice in a forward motion to help distribute fat. Gather dough together, with a pastry or bench scraper if you have one, and press into a ball, then flatten into a 5-inch disk. Chill, wrapped in plastic wrap, until firm, at least 1 hour.

Make the filling:

Heat 3 tablespoons of olive oil in a large skillet over medium to low heat and add the onions and garlic. Saute for 15 to 20 minutes, stirring frequently, until the onions are limp and there is almost no moisture remaining in the skillet. Add 1/2 teaspoon salt, 1/4 teaspoon pepper, the wine, and thyme and continue to cook for another 10 minutes, until the onions are lightly browned. Remove from the heat.

Roll out the dough on a lightly floured surface. If making individual galettes, cut the dough in half, and then into thirds. With your hands, roll each piece into a ball, and, working with a rolling pin, gently roll the dough into about a 6-inch circle. Repeat with remaining dough and place on a parchment lined baking sheet.

Place 1/4 of the onion mixture on each circle, leaving a 1/2 inch edge. Crumble 1 ounce of goat cheese on top of the onions. Place a slice of tomato in the center of each tart. Brush the tomato lightly with olive oil and sprinkle with basil, salt, and pepper. Finally, scatter 4 or 5 shards of Parmesan on each tart. Crimp up the sides and brush with an egg wash or melted butter.

Bake for 20 to 25 minutes, until the pastry is golden brown. Serve warm or at room temperature.

Vichyssoise


IMG_9194
With all the buzz surrounding French cooking these days, (thanks, Julia!) I couldn’t help but try this classic, chilled soup. And the timing was right, since all summer I’ve wanted to find a soup fit for the season, something I could rely on any day of the week, for any occasion, and still be interesting enough that I wouldn’t tire of eating it. Let's just say my expectations were high.

IMG_9074
After a few failed attempts at two versions of gazpacho this summer, I returned to a tabbed page of Fine Cooking magazine and instantly knew, even before I made it, that this soup would be the one. I hope you’ll believe me when I tell you that this soup is absolutely divine. It’s actually the only chilled soup you’ll ever need to learn because once you dip a spoon into the bowl and taste the creamy, almost custard-like consistency of leeks, potatoes and a fresh sprinkle of chives, you’ll understand.

IMG_9081
The warmed-up version of this soup is nothing new here. I make it once a week during fall and winter, without thinking now. But it’s been hot, and the recent wave of wildfires hasn’t exactly been helping the air quality in Los Angeles. Even though summer is coming to an end (sigh), there is still plenty of time to give this recipe a try. As easy as this soup is to make, there are a couple of tricks that will ensure it’s always impressive and impeccably smooth.

The Blender. I normally go on and on about my immersion blender. I’ve dedicated entire posts to how obsessed I am with this kitchen appliance, and when it’s a bit cooler outside it always stays plugged in on the counter in case I decide to make soup on a whim. But this time, I set it aside and pulled out my red KitchenAid blender instead. The blender is essential, and while I don’t tend to give orders around here, absolutely mandatory to getting the consistency right. The blade configuration will give the soup its silky, wow factor.

The Sieve. I had really, really small Yukon potatoes, and the prospect of peeling them was an experience I wasn’t ready to commit to, so I threw them into the pot, skins and all. Even if you do peel the potatoes (which is recommended), you must, must put the blended soup through a sieve. It’s Part 2 of the blending process that will ensure that no lumps or bits of skin remain in the soup. It might take a little time (and elbow grease), but the final product is absolutely worth the effort.

The Cream. Did I mention this soup was French? You don’t actually need a lot (I used slightly less than the recommended 1 cup). It’s like giving a gift wrapped without a bow—you just wouldn’t do it. (Ok, you might, when time is short or you just don’t have enough spools of ribbon, but you get the idea.) In this case, the cream finishes the soup and imparts a subtly sweet flavor that lingers in the mouth after every bite.
IMG_9191
Presentation. Not as essential as the blender or sieve, but a soup this lovely deserves a proper presentation. When I eat this alone, any bowl will do, so long as it’s sprinkled with freshly cracked pepper and garnished with minced chives. But for company last weekend I poured some into martini glasses, which was a fun way to add some visual interest at the table.

Vichyssoise (Chilled Potato and Leek Soup)

Recipe courtesy Fine Cooking

4 medium leeks, trimmed and washed as directed opposite, sliced 1/8 inch thick (about 3 cups)
2 large Yukon Gold potatoes, peeled and sliced 1/8 inch thick (about 4 cups)
2 cups whole milk
Kosher salt
1 cup heavy cream
1 Tbs. thinly sliced fresh chives, for garnish

Directions

Combine the leeks, potatoes, milk, and 2 cups water in a 4-quart pot.

Bring to a simmer over medium-high heat. Add 1-1/2 tsp. salt, reduce the heat to medium low, and simmer until a potato slice falls apart when you poke it with a fork, about 20 minutes. Remove from the heat, stir in the cream, and let cool briefly.

Purée the soup, preferably using a regular blender and working in batches, filling it only half way each time.

Strain the puréed soup through a fine sieve. Let cool to room temperature, stirring occasionally (stirring prevents a skin from forming), and then refrigerate until thoroughly chilled.

Before serving, thin the soup with water if necessary—it should be the consistency of heavy cream. Season to taste with salt. Serve cold in chilled bowls, garnished with the chives.
Pasta with Breadcrumbs

IMG_8978
If you’re ever at a loss for what to make for dinner, just open your pantry and pull down that blue box of breadcrumbs. Most of the time I’m a bit more creative—goat cheese, short ribs, butternut squash—you get the idea, but lately things have been less exciting around here. The boss where A. works has decided that overtime on his current project is a great idea, so that leaves me cooking for one, and a little uninspired these days.

IMG_8979
I first came across this recipe years ago on Everyday Italian. The original dish was sprinkled with thin slices of prosciutto for a salty bite (tasty if you have it, yes—required, absolutely not) and chopped, fresh parsley (if you have some, use it, but the Italian-style breadcrumbs already have parsley). I’ve made it with all the bells and whistles, and far more frequently as this paired-down, four ingredient version. Either way, it’s always satisfying.

Pasta with Breadcrumbs

I never measure anything for this dish. The main idea is to heat the breadcrumbs with olive oil over medium-low until they turn toasty brown. Add the breadcrumbs first, drizzle in the oil, and stir together until the oil is absorbed. Start with less oil than you think you’ll need and add it gradually to avoid having soaking wet breadcrumbs.

This recipe (if you can even call it that) is for one serving. To feed a few more people, use a pound of pasta and toss in more breadcrumbs and olive oil.


Ingredients
1 cup pasta, if cooking for one
Italian-style breadcrumbs
Olive oil
Parmesan cheese

Directions
Cook pasta in a large pot of boiling water until al dente. Drain, then toss into pan with the breadcrumbs. Stir to combine. Serve drizzled with Parmesan cheese, and prosciutto and parsley, if using.

Raspberry Cornmeal Cake

IMG_8897
I know what you’re thinking. This cake looks a lot like this one I made a few months ago. And it is quite similar, but the cornmeal changes the flavor a bit. It’s more like sweetened cornbread than fluffy buttermilk cake.  And when we sliced into this, well, it was blissful. Especially with a scoop of vanilla ice cream on top. It’s not required (you could dust some powdered sugar on top instead), but warm cake with ice cream is almost always a good idea.


IMG_8875IMG_8889


Raspberry Cornmeal Cake

Recipe courtesy Martha Stewart

Ingredients
1 1/4 cups all-purpose flour (spooned and leveled)
1/2 cup yellow cornmeal
2 teaspoons baking powder
1 teaspoon salt
1 cup plus 2 tablespoons sugar, and 1/4 cup for sprinkling
1/2 cup low-fat buttermilk
2 large eggs
7 tablespoons unsalted butter, melted, plus 1 tablespoon for skillet
2 containers fresh raspberries (5.6 ounces each)

Directions

1. Preheat oven to 375 degrees. In a large bowl, whisk together flour, cornmeal, baking powder, salt, and 1 cup plus 2 tablespoons sugar. In another bowl, whisk together buttermilk, eggs, and melted butter; pour over flour mixture, whisking to combine.

2. In a 10-inch skillet (preferably cast-iron), heat remaining tablespoon butter in the oven until melted and skillet is hot, about 5 minutes. Remove from oven; swirl to coat bottom of pan. Pour batter into skillet; scatter blackberries on top, and sprinkle with remaining 1/4 cup sugar.

3. Bake, with a baking sheet on rack below (to catch any drips), until top is evenly browned, 45 to 50 minutes. Let cool slightly, about 30 minutes. Run a knife around the edge to loosen; cut into 8 wedges. Serve warm or at room temperature.

Arugula and Nectarine Salad

IMG_8700
A few months ago when Andrew and I visited wine country, we tasted a lovely Viognier from Melville. It smelled like nectarine from the first swirl, and tasted sweet, yet dry. We bought a bottle and I immediately started thinking of what to serve it with. I imagined my favorite kind of meal: a lingering summer evening with cheese, bread, and a light main course.


IMG_8671IMG_8673


Thank you, Food and Wine for a wonderful recipe. If you examine the magazine photo closely, you'll notice that my salad looks nothing like it. To make it a main course, I used a salad-appropriate amount of arugula, gave up on cutting perfect goat cheese rounds, and substituted nectarines for the apricots. I suppose I don't need to tell you how well the evening went. We also ate these for dessert, which, as I've already explained, are only mildly addicting.


IMG_8683IMG_8687


For the original recipe, head to Food and Wine

Pizza with Mushrooms and Thyme

IMG_8796
I had the good fortune to get a reservation at Pizzeria Mozza for my birthday lunch with co-workers. As much as I have a love/hate relationship with L.A., I wouldn’t have been sitting in a world-famous restaurant unless I moved here. So, it was a bit of a peace offering. Great pizza in exchange for a few more smiles driving around town.


IMG_8770IMG_8774


IMG_8775IMG_8778


It was the first visit each of us (a hungry group of six), so we decided to order five pizzas to share. Of all the slices I had, hands down, this was my absolute favorite. The mushrooms were so rich and flavorful (likely sautéed in butter), the cheese creamy and light, and the thyme echoed the earthiness of the mushrooms. I might not have the pizza dough perfected quite yet, but I figured I could do a decent job attempting the flavors of this pizza at home. So here’s my version of Nancy Silverton’s funghi misti pizza.


IMG_8780IMG_8783


Pizza with Mushrooms and Thyme

The measurements are approximate. Depending on the size of your dough, you may need more or less cheese. Just eyeball everything and use any amount you'd like!

Pizza Dough (recipe follows)

Mushrooms, sliced (I had one large portobello and 10 crimini mushrooms to work with, about 2 cups when sliced. I would use a minimum of this amount. If you have access to more, use more.)

1 cup grated Taleggio Cheese
1 cup grated Fontina Cheese
3-5 sprigs fresh Thyme
1 tbsp. butter
1 tbsp. olive oil, plus more for drizzling
Salt and Pepper
Cornmeal, for dusting

1. Add mushrooms to a sauté pan with a tab of butter and the olive oil. Stir to coat. Cook for 5-8 minutes, until mushrooms are cooked through and softened. Add thyme, salt and set aside.

2. If using a pizza stone, slide it in a preheated oven (the highest your oven will go) for 30 minutes prior to baking. Roll out pizza dough and place it on a cornmeal-dusted peel. Top with both cheeses, then spread the reserved mushrooms over the top. Brush the crust with olive oil and bake for 8-10 minutes, or until crust is brown and cheese is bubbly.

IMG_8794
Pizza Dough

Recipe adapted from Giada de Laurentiis

So, you might know that I don't always have time for pizza dough. But last Friday evening, I did. I used active dry instead of instant yeast, and let it rise for an hour instead of my usual 20 minutes. Actually, I might like this dough better. It was flavorful, easy to work with, and a snap to put together, even after coming home from a long day at work.

1/2 cup warm water (105 to 110 degrees F)
2 teaspoons active dry yeast (1 packet)
2 cups all-purpose flour
1 teaspoon salt
3 tablespoons olive oil

1. In a stand mixer fitted with the dough hook, mix the warm water and yeast with your fingers until blended. With the mixer on medium speed, gradually add flour and salt. Add oil. The dough should begin pulling away from the bowl easily. Continue to knead on medium speed for about 8-10 minutes, until dough is smooth.

2. Transfer the dough to a large oiled bowl and turn the dough to coat with the oil. Cover the bowl with plastic wrap and set aside in a warm draft-free area until the dough doubles in volume, about 1 hour. Punch the down dough and divide into 2 equal balls. (The dough can be used immediately or stored airtight in the refrigerator for 1 day.)

Cherry Brown Butter Squares

IMG_8711IMG_8662
The brown butter for these bars smells so good, you might be tempted to stick your finger in the (cooled) saucepan and start slurping it down. The same reflex goes for the batter, after you’ve whisked the butter into the bowl and stirred in all the browned bits of flavor.  But wait, it gets better. Dark, juicy cherries sit smack in the middle of a vanilla-scented crust and filling. Sound tempting yet?


IMG_8666IMG_8665


I’d been waiting for an opportunity to make these when a bag of cherries magically arrived in my CSA box this week. And I’m not sure I can even eloquently explain how magical they are. They’re also perfect for any bbq’s, beach days nights at the Hollywood Bowl (where I’ll be taking them next week), or any event that requires food to be transported. They’re super cute, stack well, and will be gushed over by all who try them. I promise you that.


IMG_8663IMG_8709


Cherry Brown Butter Squares

Recipe from Smitten Kitchen, via Bon Appetit

Makes 16 2-inch square bars

It might seem like you won’t have enough crust, but just work it gently with your fingers and it will spread to cover the entire pan. Since I don’t own a cherry pitter, my pairing knife and I got to know each other a little better this weekend. A pitter would be useful, but is certainly not mandatory for stellar results.

Ingredients

Crust:
7 tablespoons unsalted butter, melted
1/3 cup sugar
1/4 teaspoon vanilla extract
1 cup plus 1 tablespoon all purpose flour
Pinch of salt

Filling:
1/2 cup sugar
2 large eggs
Pinch of salt
1/4 cup all purpose flour
1 teaspoon vanilla extract
1/2 cup (1 stick) unsalted butter, diced
1 pound sweet cherries, which will yield 12 ounces of pitted cherries, which yielded some leftovers, perfect for snacking (alternately, you can use 12 ounces of the berry of your choice)

Directions:

Make crust: Preheat over to 375°F. Cut two 12-inch lengths of parchment paper and trim each to fit the 8-inch width of an 8×8-inch square baking pan. Press it into the bottom and sides of your pan in one direction, then use the second sheet to line the rest of the pan, perpendicular to the first sheet. (I used foil.)

Using rubber spatula or fork, mix melted butter, sugar, and vanilla in medium bowl. Add flour and salt and stir until incorporated. Transfer dough to your prepared pan, and use your fingertips to press the dough evenly across the bottom of the pan. Bake the crust until golden, about 18 minutes (it will puff slightly while baking). Transfer crust to rack and cool in pan. Maintain oven temperature.

Make the filling: Cook butter in heavy small saucepan (a lighter-colored one will make it easier to see the color changing, which happens quickly) over medium heat until deep nutty brown (do not burn), stirring often and watching carefully, about six minutes. Immediately pour browned butter into glass measuring cup to cool slightly.

Whisk sugar, eggs, and salt in medium bowl to blend. Add flour and vanilla and whisk until smooth. Gradually whisk browned butter into sugar-egg mixture; whisk until well blended.

Arrange pitted cherries, or the berries of your choice, in bottom of cooled crust. Carefully pour browned butter mixture evenly over the fruit. Bake bars until filling is puffed and golden and tester inserted into center comes out clean, about 40 minutes. Cool bars completely in pan on rack.

Use the parchment paper overhang to carefully remove cooled bars from pan and place them on a cutting board and cut them into squares with a very sharp knife.

Candied Walnuts

IMG_8560
I’m sure this has happened to you. You’re at the store, crossing items off your list, and you can’t find the last ingredient. You’ve combed the aisles, double checking that you didn’t just miss it. That was me, wandering around Gelson’s for candied walnuts, which I was certain they must have. But they didn’t. And I was not prepared to drive from store to store to find them.


IMG_8554IMG_8561


So on the drive home I figured there must be a way to make them myself, in less than 30 minutes, because I had to toss them into a salad for the dinner I was going to.  And let me tell you, candied walnuts are a breeze. Aside from the star ingredient, you only need sugar and salt to pull this off. (And it’s really impressive to say that you candied them yourself.)


Candied Walnuts

Ingredients

2 Tablespoons Sugar
½ cup raw walnuts
Pinch of coarse salt

Directions

1. Preheat oven to 350°F. Use middle rack in oven. Lay walnuts out on a baking sheet in a single layer. Bake for 5 minutes. Test for doneness. If not quite toasted enough, toast for 1 or 2 more minutes. Be careful not to burn. Remove from oven and let cool in pan on a rack.

2. Pour sugar into a medium saucepan with a thick bottom. Have walnuts nearby, ready to quickly add to the pan at the right time. Cook sugar on medium heat, stirring with a wooden spoon as soon as the sugar begins to melt. Keep stirring until all the sugar has melted and the color is a medium amber. As soon as sugar is melted and the color is a medium amber, add the walnuts to the pan, quickly stirring and coating each piece with the sugar mixture.

3. As soon as the walnuts are coated with the sugar mixture, spread them out on a rimmed baking sheet, lined either with a Silpat non-stick mat, or with wax paper or parchment paper. (As I was out of parchment, foil worked fine.) Use two forks to separate the walnuts from each other, working very quickly. Sprinkle the nuts with the salt. Let cool completely.

Nectarine, Mascarpone and Gingersnap Tart

IMG_8591IMG_1068_2


Ok. I’ll say it. I almost, almost destroyed this tart. Do you ever make the simplest recipe mistake, when you aren’t thinking, then kick yourself for missing something so simple? Today was one of those days. Oops.


IMG_8563IMG_8567


Everything started well. The gingersnaps were whirling away in the food processor as I grabbed a large pat of butter from the fridge. I glanced at the recipe quickly. 6 tablespoons. Then I glanced at my conversion chart. ¾ cup. Except that 6 tablespoons is actually ¼ cup, so I streamed double the amount of butter into the cookie mixture. As I poured it in, I thought it looked like a lot, but didn’t give my conversion a second thought. Until I started pressing it into the pan. The butter was gathering in pools, and the cookies were sopping wet. That’s when I realized what had happened.


IMG_8575IMG_8580


To salvage the mess, I scooped everything back into the food processor. I couldn’t remove any butter, but I proceeded to add the rest of the box of cookies until it evened everything out. Crisis averted.


IMG_8583IMG_8585


After that, this tart was smooth sailing. The filling is creamy, light, and lovely with hints of lemon and sugar. The sweet nectarines were juicy and worked so well with the crust and filling (even without the crystallized ginger). I suppose you could even eat this for breakfast if you have any leftovers.


Nectarine and Mascarpone Tart in a Gingernsap Crust


Recipe from Smitten Kitchen

Crust
37 gingersnap cookies, coarsely broken (about 9 ounces; about 3 1/4 cups plus 2 tablespoons of pieces)
6 tablespoons unsalted butter, melted (1/4 cup!)

Filling
1 8-ounce container mascarpone cheese
6 ounces cream cheese, room temperature
1/4 cup sour cream
1/4 cup sugar
1 teaspoon grated lemon peel
1/4 teaspoon vanilla extract
1 tablespoon finely chopped crystallized ginger (optional)

Topping
4 to 5 small nectarines, halved, pitted, cut into thin slices
1/4 cup peach jam, warmed
2 tablespoons finely chopped crystallized ginger (optional)

For crust: Preheat oven to 350°F. Finely grind gingersnaps in processor. Add butter and blend until crumbs are evenly moistened. Press mixture over bottom and up sides of 9-inch-diameter tart pan with removable bottom. Bake crust until color darkens, pressing sides with back of spoon if beginning to slide, about 8 minutes. Cool completely.

For filling: Beat first 6 ingredients in medium bowl until smooth. Beat in crystallized ginger if you’re using it. Spread filling in prepared crust. Cover loosely and refrigerate at least 2 hours and up to 1 day.

For topping: Overlap nectarine slices atop filling in concentric circles. Brush with jam. Sprinkle with chopped crystallized ginger if you’re using it. (Mint makes an excellent garnish, if you’re skipping the ginger.) Serve, or refrigerate up to 6 hours.

a foodie tour of LAS VEGAS

Last weekend Andrew and I took off for a desert road trip to Las Vegas. We had a lot of memorable meals, and here were a few of our stops:

IMG_8472
Yellowtail. On our way to see Mystère at Treasure Island, we wandered through the Bellagio and stopped at Yellowtail for some sushi, at a little place where their signature roll has "strawberry" in the title. Yum. Thinly sliced berries were placed on top of the roll, adding a nice sweetness at the end of your tempura-battered bite. If you're in the mood for something light and perfectly bite-sized, this is your place.

Mesa Grill. I’m a big fan of Bobby Flay and secretly hoped I’d spot him in the kitchen when we dined at Mesa, his restaurant in Caesar’s Palace. Sadly, Bobby was nowhere to be found (except on the back of his cookbook’s being sold at the front), but his Goat Cheese "Queso Fundido" was spectacular. Just try to imagine it in your mouth: four cheeses baked until hot and bubbly, topped with marinated peppers, served with crisp blue corn tortilla chips. We couldn’t stop eating it. (As a side note, Andrew’s pork sandwich was also a home run.)

IMG_8407IMG_8409


Burger Bar. Yes, yes, the burgers are good, but what stole the show was dessert — The Chocolate Burger! It combined some of my favorite dessert flavors, and things aren’t what they seem.


IMG_8515


Here’s the breakdown:
Bun = Glazed donut
Patty = Flourless Chocolate Cake
Cheese = Passion Fruit
Lettuce = Mint
Tomato = Strawberry


Plus a little whipped cream on the side for good measure. It was really fun to eat!


Casa Don Juan. World’s. Best. Margarita. Ok, maybe I haven’t tried enough to be truly bias, but they were a hit. Blended with the good stuff (Don Julio), let’s just say I would have been in trouble if I had more than one. This place is downtown, off the strip, and less saturated with tourists, making it a worthwhile stop for a relaxing, tequila-filled evening. The live guitarist was also a nice touch.


Emma Jean’s Hollandburger Café. On the way home we pulled off in Victorville to try a dive featured on Guy Fieri’s Food Network show, Diner’s Drive-In’s and Dive’s. I’ll admit, this was more of a stop for Andrew, who, incidentally, loved his pastrami sandwich. The regulars are really regulars – one woman walked behind the counter to fill up her friend’s coffee cup, and then proceeded to rummage through the small refrigerator for a beer. We had a great view from the counter stools, and laughed to ourselves while we watched everything unfold. I’m not sure if I’d stop here again, but it was fun to try a place we saw on TV.


IMG_8516

Roasted Tomatoes with Ricotta

IMG_8187
Tomatoes look cute all dressed up, don’t they? This dish might be an appetizer, but it became an entrée last week when we had an unexpected snag in the kitchen. I came home from work (planning to make grilled fish and these tomatoes), and smelled gas leaking.
IMG_8194
We called the gas company (around 6 pm), who arrived hours later (at 8:30 pm) and munched on cereal while waiting for them to arrive. The fish was saved for another day, but I decided to put these together and keep them in the fridge so we’d have something more savory to eat as a late night snack. As soon as the front door closed (gas problem fixed!) I popped these into the oven, and we devoured them almost before I had a chance to take their picture.

For the recipe, head over to The Pioneer Woman

Pasta with Braised Short Ribs

IMG_8159
You know how much I love short ribs. Especially when they’re braised, tender, and falling off the bone. This cut of meat, sometimes labeled “great for soups” in the grocery store, is anything but humble when you let it braise for hours.


IMG_8152IMG_8153


Of course, when I was watching Giada at Home and saw that this recipe was featured in her 30-minute show, I didn’t have to think.  I just needed to make my way to the computer and print this mouth-watering recipe. Next, I needed an excuse to make it. I say excuse because this is the kind of meal, while nice for two, is too impressive not to share. Luckily, one of our wonderful friends came to visit us from San Diego, so the menu was easy to plan.


IMG_8160IMG_8162


Penne with Braised Short Ribs
Recipe courtesy Giada de Laurentiis


Ingredients


4 pounds beef short ribs
Kosher salt and freshly ground black pepper
1/4 cup olive oil
1 large onion, diced
3 cloves garlic, coarsely chopped
5 Roma tomatoes, cut into eighths
1 cup red wine, such as Cabernet Sauvignon
3 tablespoons Dijon mustard
2 cups low-sodium beef broth
1 pound penne pasta
1/4 cup freshly grated Parmesan
1/4 cup chopped fresh flat-leaf parsley

Directions

Place an oven rack in the lower 1/3 of the oven. Preheat the oven to 350 degrees F.

Season the ribs with salt and pepper. In a large heavy-bottomed Dutch oven or ovenproof stock pot, heat the oil over medium-high heat. In batches, add the ribs and brown on all sides, about 8 to 10 minutes. Remove the ribs and set aside. Add the onion and garlic and cook, stirring frequently, for 2 minutes. Add the tomatoes, wine and mustard. Bring the mixture to a boil and scrape up the brown bits that cling to the bottom of the pan with a wooden spoon. Return the ribs to the pan. Add the beef broth, cover the pan and place in the oven for 2 1/2 hours until the meat is fork-tender and falls easily from the bone.

Remove the ribs from the cooking liquid. Using a large spoon, remove any excess fat from the surface of the cooking liquid. Using a ladle, transfer the cooking liquid in the bowl of a food processor. Process until the mixture is smooth. Pour the sauce into a saucepan and keep warm over low heat. Remove the meat from the bones. Discard the bones. Using 2 forks, shred the meat into small pieces. Stir the shredded meat into the sauce. Season with salt and pepper, to taste.

Bring a large pot of salted water to a boil over high heat. Add the pasta and cook until tender but still firm to the bite, stirring occasionally, about 8 to 10 minutes. Drain the pasta and place in a large serving bowl. Using a slotted spoon, remove the meat from the sauce and add to the pasta. Pour 1 cup of the sauce over the pasta. Toss well and thin out the pasta with more sauce, if needed. Sprinkle the pasta with Parmesan cheese and chopped parsley before serving.